
Deck Maintenance by Matthews’ Painting
January 1, 2012Pressure Washing House Before Painting
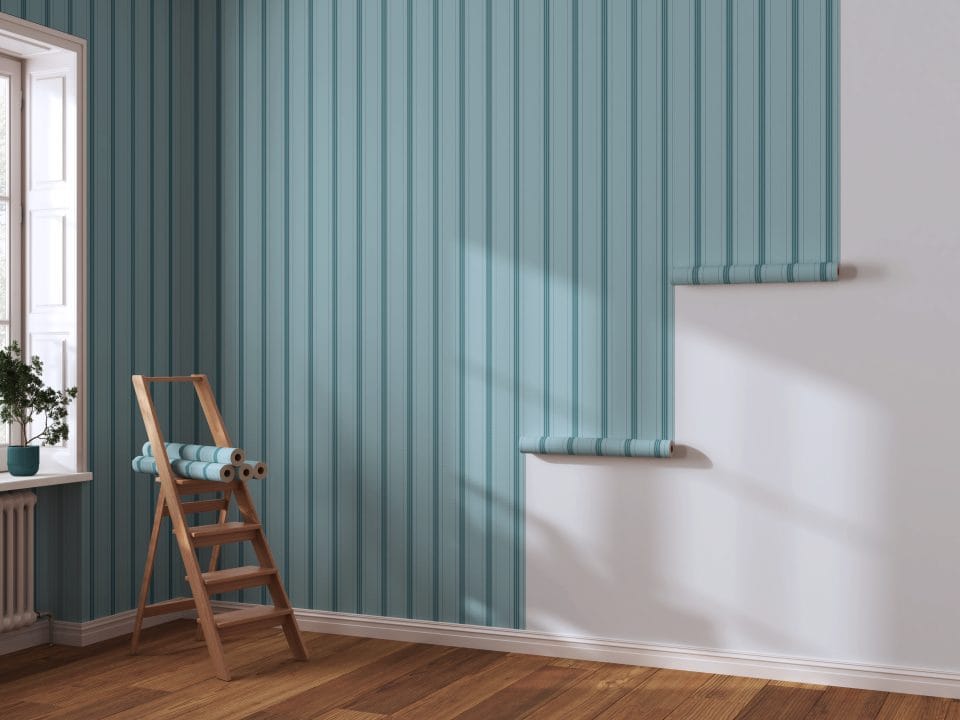
March 5, 2012I am sure many of you have tried to remove wallpaper and called it quits after too many failed attempts or it it just taking too much of your time. Matthews Painting Company, from Warsaw, Indiana has been removing wallpaper for over 13 years. Try following some of our wallpaper removal procedures and techniques as mentioned below:
Supplies you will need:
- 1 gallon of DIF Concentrate, NOT Gel!
- Garden pump sprayer, any size
- Absorbent paper drop cloths with plastic back
- 6 wide drywall knife, which you might call a large putty knife
- 5 gallon bucket and sponge
- Screwdriver for removing outlet and switch covers
- Stanley knife or smaller razor blade knife
- Drywall Pan
- A fan
- Guardz sealer and primer from Zinnser (If drywall gets damaged)
1. First we recommend moving all the furniture to the middle of the room and covering with plastic. Lay down absorbent paper drop cloths with a plastic back to catch and absorb wallpaper removal solution. Take off all the outlet and light switch covers and cover with tape and plastic to keep moisture out. Tape and plastic any phone jacks as well.
2. Next, find a seam on the wallpaper. Using a putty knife, start to pry up the wallpaper seam. If you can start a wallpaper seam and remove the top layer off in its entirety, or at least in large pieces, then continue to do this throughout the entire room before applying any solution. What will remain at this point is a fuzzy paper called backing. It will be white or off white. If you cannot get the top layer of wallpaper off or if the wallpaper just comes off in little pieces, stop. (In some cases the wallpaper was hung before the trim was installed. If you find this to be the case, you will need to carefully use your razor blade knife at a 45 degree angle and cut the wallpaper from around the trim. This works best prior to applying the solution. Another option is to remove your trim, but you would have to have an experienced carpenter handy to reinstall it back for you.)
3. Fill half of a 5 gallon bucket with hot water; you will use this later to remove wallpaper glue. Now mix the DIF solution in your garden sprayer with 1 gallon of hot water according to label directions. Spray down 2-3 sections of the wallpaper or the fuzzy wallpaper backing using a fine mist. Start at the top of the wall and work downward overlapping your spray. Continue to repeat this on the same 2-3 sections until the wallpaper or wallpaper backing will not take anymore solution. You may have to wet these same sections up to 4-6 times to have success in removal. Here is a test; touch the wallpaper or wallpaper backing a couple of minutes after your last application. If your fingers are soaked, then you do not need to re-apply the solution.
4. At this point try to peel off the wallpaper or wallpaper backing. If the wallpaper or wallpaper backing starts to tear, or does not come off at all, repeat the application procedure in #3 above. If it still is difficult to get off, use your 6″ drywall knife to scrape and lift the wallpaper or wallpaper backing away. If the backing remains after removing the top layer of wallpaper, or if you have multiple layers of wallpaper, repeat the solution application procedure in #3 above as well.
5. Once the wallpaper and wallpaper backing are off, mist the area of the wall where you just removed the wallpaper from. This step will assist you in removing the glue that is still on the wall. Starting at the top of your wall, start scraping the glue downward with your 6″ drywall knife while holding your drywall pan on the wall underneath, so that it is catching any heavy residue of glue. After you have removed most of the glue this way, use your sponge and hot water to remove the remaining residue of glue off of the wall. If you touch your wall, and it still feels tacky, then you need to keep sponging until the tacky feel is gone. Change water often in your 5 gallon bucket and wring out your sponge often. Pay close attention removing glue in the corners and along trim since these places are often missed.
6. Turn on a fan and dry out the room for 1 day. If there is any torn drywall area that expose the brown drywall paper, cut out the loose areas with your razor blade. Next, seal your walls with Guardz primer. This you will brush and roll on. It is a thin product that goes on milky, but dries clear. Now you are ready for drywall repairs and spot priming your repairs with the Guardz. Now you are ready to paint your walls. If you are re-hanging new wallpaper, use wallpaper sizing prior to hanging.
7. If this seems all to overwhelming, call us or contact us on our website and we can give you a quote. We service the Warsaw, Syracuse, Leesburg, Fort Wayne, Columbia City, Goshen, Elkhart, Winona Lake, Rochester, Plymouth, North Manchester, and the surrounding areas.
Professional Wallpaper Stripping,Removal, and Hanging services for Warsaw, Winona Lake, Leesburg, Lake Tippecanoe, North Webster, Syracuse, Lake Wawasee, Goshen, Elkhart, Columbia City, Rochester, Plymouth, Culver, North Manchester, Ft. Wayne, and surrounding Indiana cities. If your area is not listed, please contact us.
Professional Wallpaper Stripping, Removal, and Hanging services for Kosciusko County , Fulton, Huntington, Lagrange, Marshall, Miami, Noble, Wabash, and Whitley Counties.
